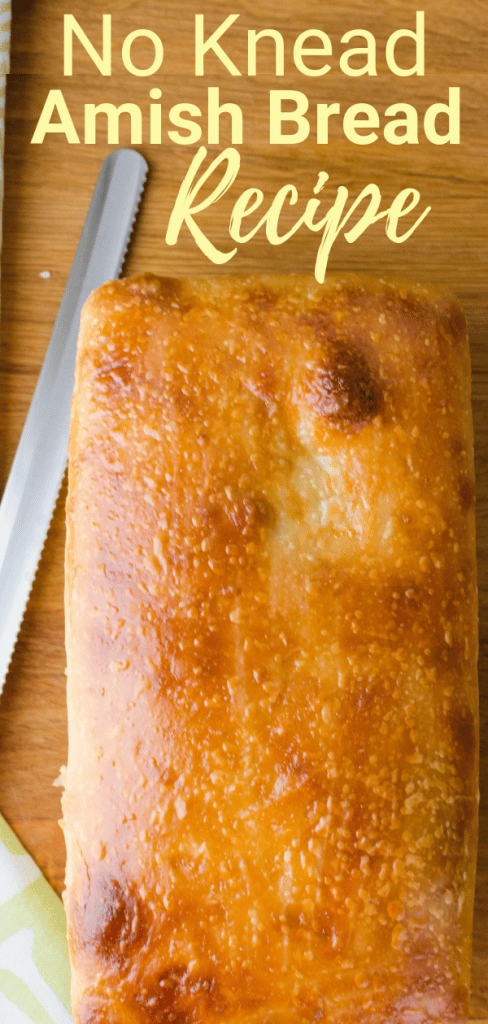
Amish Bread Recipe
Scared of making homemade bread? Toss your inhibitions aside. This Amish bread recipe uses potato flakes in the starter and in the dough for an easy no knead bread that everyone will love. I’ve been making this recipe for over 30 years, ever since my dear friend, Patti, gave me a loaf, along with the recipe and a cup of her Amish bread starter. If you’ve never heard of an Amish bread recipe, perhaps you know it by it’s other moniker, ‘Friendship bread recipe‘. Either way, it produces tender, sorta-sweet, sorta-sour loaves that will keep on giving for as long as you feed the Amish bread starter.
Get my latest recipes, helpful kitchen tips and more good things each week in your inbox.
The secret to this Amish bread recipe is in the starter — and frankly, I kinda pooh-poohed it when I first read the instructions which called for using dried mashed potato flakes — as in Hungry Jack or Idahoan. This may brand me a food-snob, but I can honestly say, I’d never purchased dried mashed potatoes until I became hooked on Patti’s Amish bread recipe.
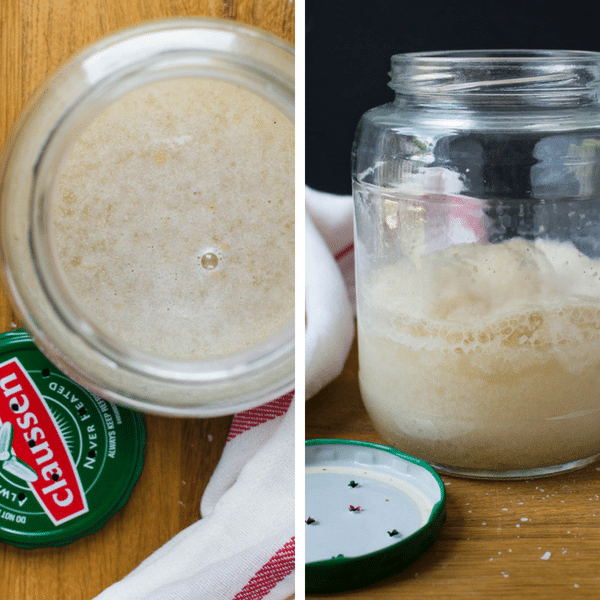
Table of Contents
Make the Amish bread starter
- To make the Amish bread starter and keep it going you need a large glass jar that can breathe. Jars don’t naturally breathe, so you’ll have to jury-rig something. I asked my husband to help me with a solution… tapping a nail several times through the lid of a large, clean pickle jar. Don’t laugh, it works.
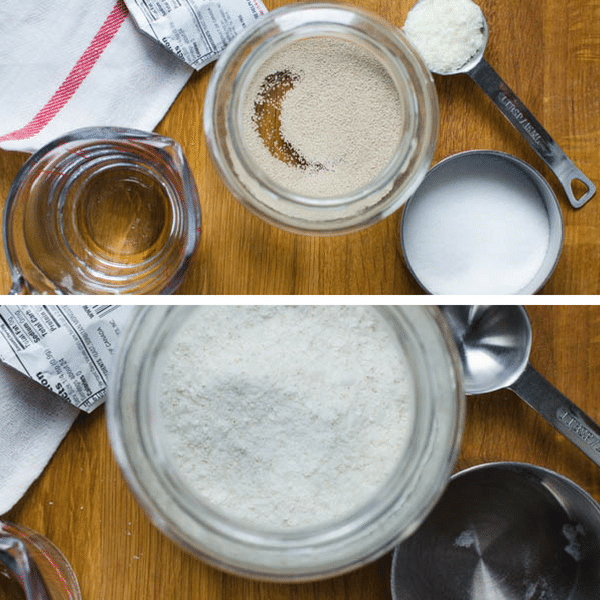
- With the starter receptacle ready to go, it’s time to make the Amish bread starter by mixing sugar, yeast, warm water and dried mashed potato flakes (careful not to get the flavored kind unless you want “sour cream and chive bread– actually, that sounds pretty good).
- Mix the ingredients in the jar and let it rest on the counter with the lid off for 8-10 hours.
- Place the lid on the jar and refrigerate for 3-8 days.
- Feed the starter. (My daughter named the sand-colored, sediment-looking starter, THE BEAST — as in, “it’s time to feed THE BEAST.”) Feed the
beaststarter with more potato flakes, sugar and warm water. - Stir it together and let it rest (lid off) on the counter for 8-10 hours. As the starter sits on the counter you’ll see it bubbling and erupting in little gaseous spurts — it kind of reminds me of a snow globe after it’s been shaken (this is why Emily calls it THE BEAST — it’s alive.
- Refrigerate again for another 3-8 days.
- The starter needs to be fed at least 3-4 times before you make the bread. (Incidentally, I had to get a bigger jar after the third “feeding”).
First, let me say that making the bread is a full days’ (16-24 hour) process, but it’s largely hands-off, consequently the only thing you need to think about is “when do I want to actually eat this Amish bread?” If you want to serve it Sunday morning — you’ll need to start the process on Saturday morning.
How to make the bread:
- Start with the Amish bread starter. Stir the beast so that it’s well mixed and then pour 1 cup of starter into a glass measuring cup. Let it sit on the counter until it’s room temperature and active. For me, this takes about an hour, so if I’m making bread that day, I usually set it on the counter while my coffee is brewing in the morning — and by the time I’ve finished my third cup (don’t judge) it’s ready.
- Add the bread flour (yes, you really should use bread flour – it has more protein than all purpose flour and will help you achieve higher rise and more stability in the dough) sugar (if you want a sweeter loaf), salt, Amish bread starter, vegetable oil and warm water (about 105° – 110°).
- I use my stand mixer to mix the dough, but I’ve also done it by hand. By hand takes a little more elbow grease (obviously), but still turns out a delicious – if not sturdier finished product. The stand mixer blends all the ingredients lickety-split.
- Mix on low speed using the dough hook attachment until the dry ingredients are mostly incorporated, then turn the mixer up a few notches and continue to mix until the dough starts pulling away from the bowl in long, stringlike strands. The dough will be very wet and sticky.
- Use a little vegetable oil to grease the inside of a large mixing bowl and place the dough in it. Lightly brush the top of the dough with the oil and cover with a clean towel.
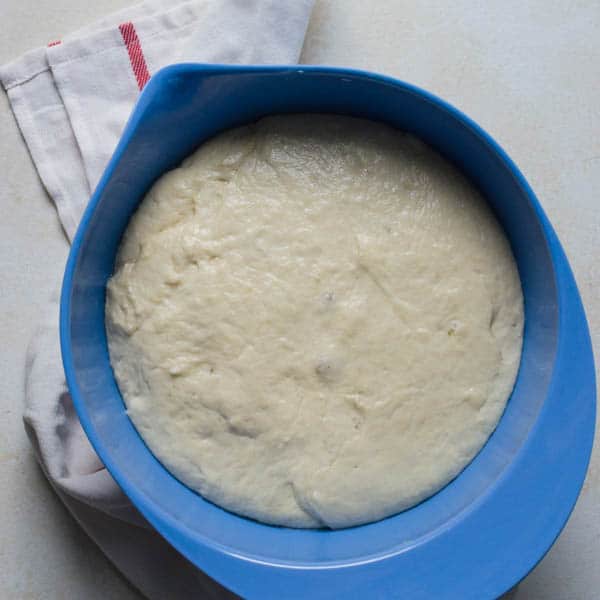
- Let the dough rise in a warm, draft free place for 8-14 hours.
- Transfer the no knead bread dough to your baking pans for the second rise — and this is where you can get creative, because there’s a lot of dough and it will take the form of any receptacle you want.
No Knead Bread Variations
This easy no knead bread is open to lots of variations, starting with what type of loaf you want.
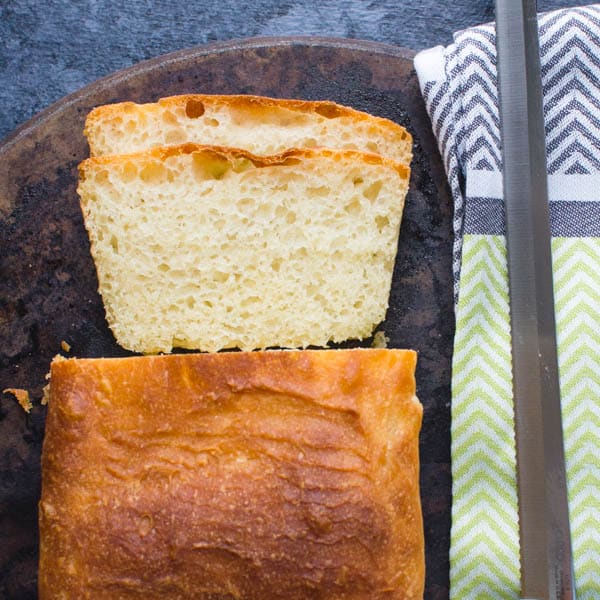
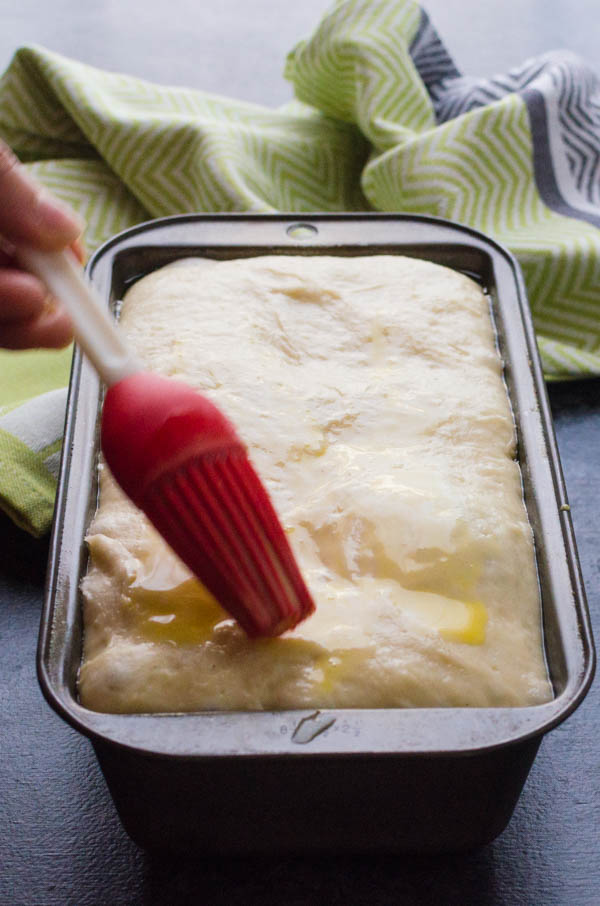
- No Knead Bread Variations #1: It will make two large loaves (9 x 5 x 3) or three medium loaves (8 1/2 x 4 1/2 x 2 1/2).
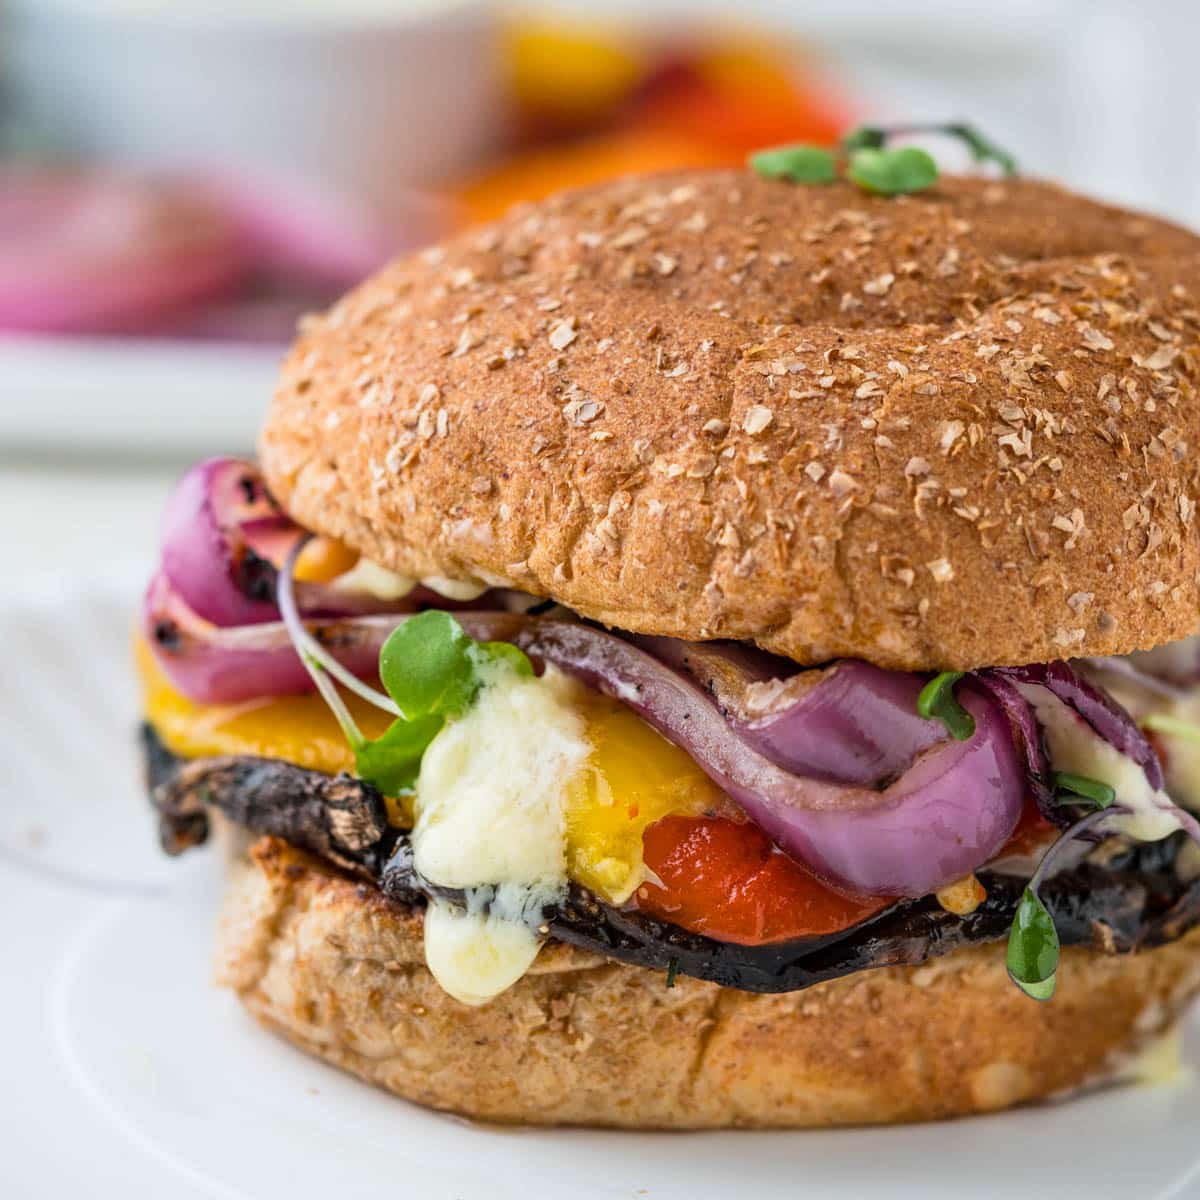
- Variation #2: I’ve even put 2/3 of the dough in a greased pie plate to make a round boule – which is perfect for making large picnic or tailgate sandwiches.
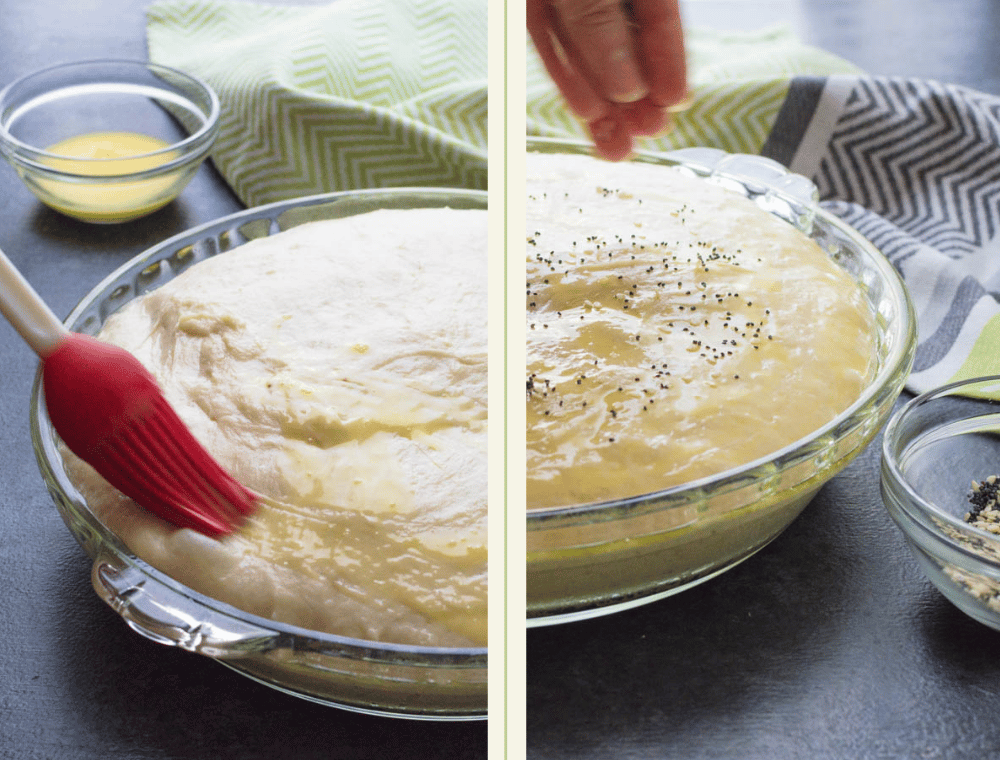
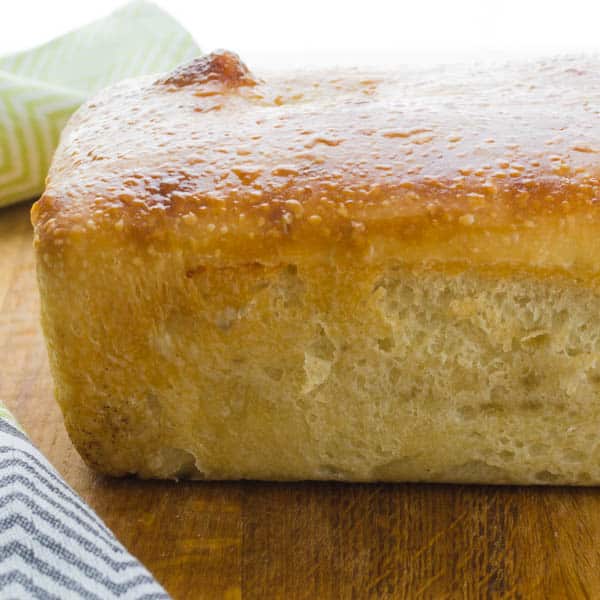
- #3 is about the sheen on the crust. Brush it with an egg wash for a glossy finish — or don’t for a more rustic look.
- No Knead Bread Variations #4: Sprinkle with your favorite toppings. I use sesame, poppy and sea salt but you could also use “Everything Bagel Mix” for a fun twist.
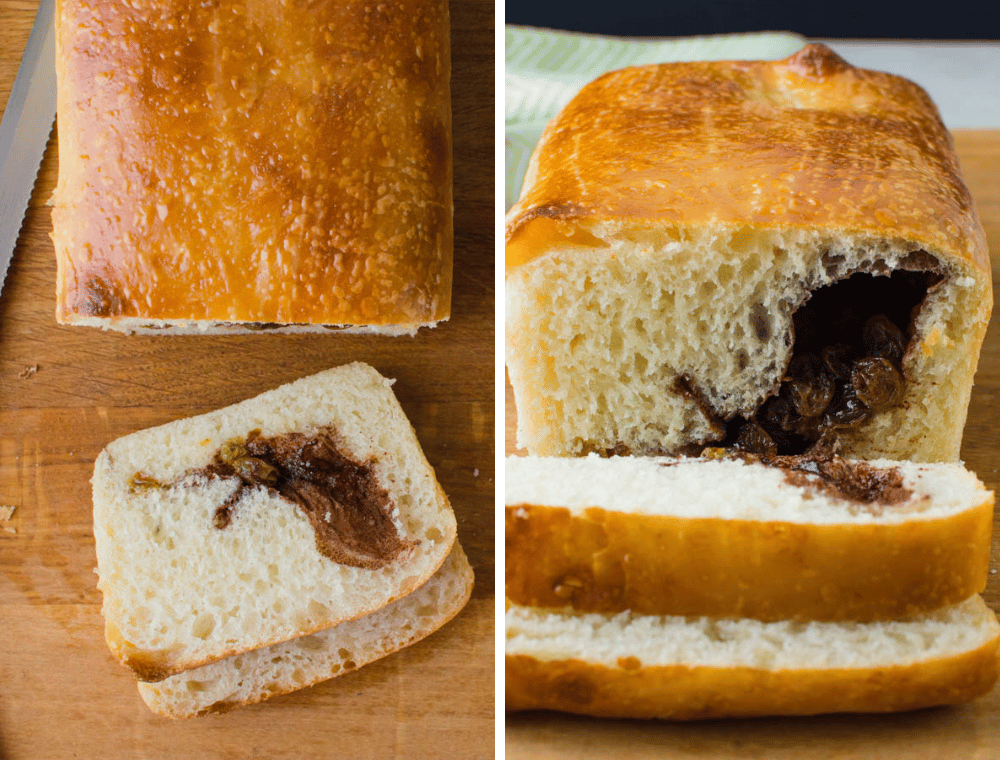
- Variation #5: To make it more of a breakfast bread – press the dough into a flat rectangle and sprinkle with cinnamon sugar. You can embellish with raisins or nuts (or both). Then roll the dough into a log, tuck the ends under and place it in a loaf pan to rise for a lightly spiced cinnamon raisin loaf.
- No Knead Bread Variations #6: Other riffs — omit the optional sugar in the bread recipe and roll in chopped kalamata olives and sun-dried tomatoes or for a cheese bread, try grated parmesan, pepper-jack or crumbled blue cheese for a savory side.
The point is that this bread can be as simple or dressed up as you want it to be. Make two or three batches to get the hang of working with the dough and then start your experimentation. If you come across a really exceptional combination, be sure to tell me about it (and snap a picture, too — so I can share it with the rest of the tribe in the weekly newsletter.) Below is a pumpkin spice/raisin combo that Emily helped me with — it made a tunnel of spice throughout the loaf.
Other easy bread recipes you might like:
Amish Bread Recipe
INGREDIENTS:
FOR THE STARTER:
- 2 ½ teaspoons active dry yeast
- ¾ cup sugar
- 3 tablespoons instant potatoes
- 1 cup warm water
FEED THE STARTER EVERY 3-8 DAYS WITH:
- ¾ cup sugar
- 3 tablespoons instant potatoes
- 1 cup warm water
FOR THE AMISH BREAD / FRIENDSHIP BREAD RECIPE:
- 6 cups bread flour
- ½ cup sugar (optional)
- 1 tablespoon salt
- 1 cup starter at room temperature
- ½ cup canola oil + more for oiling bowl and bread
- 1 ½ cups warm water
DIRECTIONS:
MAKE THE STARTER:
- In a large jar, combine the yeast, sugar, instant potatoes and warm water. Stir to combine and let sit on the counter for 8-10 hours. Cover with the "holy" lid and refrigerate
FEED THE STARTER:
- Every 3-8 days add the additional sugar, instant potatoes and warm water to the starter. Stir the starter and let it sit on the counter for 8-10 hours. Cover and refrigerate.
- Feed the starter 3-4 times before making the bread.
MAKE THE AMISH BREAD / FRIENDSHIP BREAD:
- In a large bowl or stand mixer, combine the bread flour, sugar (if using), salt, starter, canola oil and water. Mix until well combined. Shape into a round.
- Lightly oil a large bowl. Transfer the dough to the bowl and lightly brush with oil over the top. Cover with a piece of wax paper and a dish towel. Let rise between 8-10 hours (or overnight).
- Spray three 8 x 4 1/2" loaf pans loaf pans with vegetable spray. Divide the dough between the pans. Brush the tops of the loaves lightly with olive oil. Cover with wax paper and towel to rise for another 8 hours.
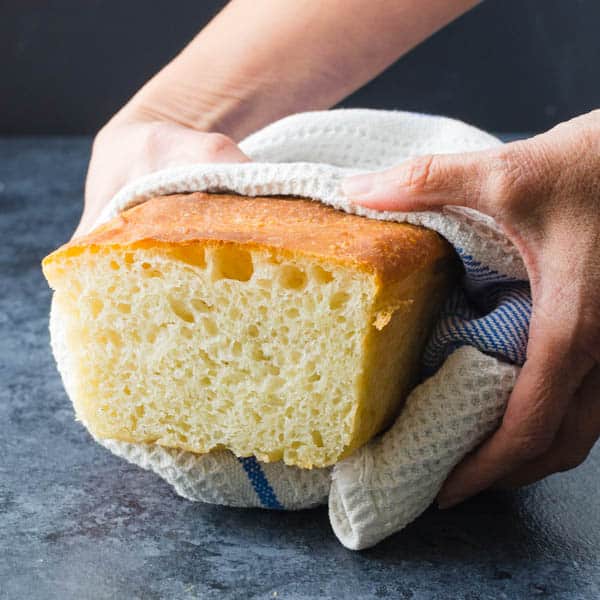
- Preheat the oven to 350°. Bake the bread for 30-35 minutes or until cooked through with a golden crust. Note: larger pans will require more bake time -- 9 x 5 should be 40-45 minutes and if you're using a pie plate for a boule-style loaf, I advise using a glass one so that you can peak at the bottom of the loaf to judge the doneness by how brown it is -- it should be a very light brown color and depending on how much dough you place in the pan, could take 40-55 minutes.
GIVE AS GIFTS:
- Wrap up a loaf of the sourdough bread as a gift. Transfer 1 cup of the starter to a canning jar along with a copy of the recipe for the recipient. Arrange in a basket for a friend who likes to bake.
RECIPE VIDEO:
NUTRITION:
Pin “Amish Bread Recipe” For Later!
I have this starter I got from my Mother who has been making this bread for 40 years. Only difference is I feed my starter and let it sit out all day at that time I then make my bread and let rise all night and in morning I put in pans to let rise again then bake. If I am understanding your directions you feed your starter let sit out all day then place back in refrigerator. The next morning you take 1 cup out and mix your bread.. is there a difference in bread doing it my way. It taste and rises good.. just wondering??
There’s probably not much of a difference – and if you’ve been making your Mother’s starter with no issues. I’d stick with that.
I made this bread for many years when my girls were growing up. Haven’t made it in years, and was happy to find a recipe for the starter. One of my girls is gluten intolerant. Do you have a recipe to make gluten free bread for her using the starter? I’d love to send her some for Christmas.
That’s a great question. I’ve never tried to make this gluten free, but I imagine that you could substitute cup 4 cup or another all purpose gluten free “flour” for the bread flour. Worth a shot.
Love this recipe! I used to be a bread baker and have worked with starters, but have never started one LOL. I love how approachable this recipe is. And potato flakes…who knew! Thanks for sharing with us, Lisa…just pinned!
I always wanted to try this! And what a fabulous gift this would make. Thanks for the share, I LOVE homemade bread!
The texture on that bread looks incredible. I bet it makes the best sandwiches. Can’t wait to try this. Thanks for sharing!
I tried making my own bread starter once but I failed. Until now I have no idea what went wrong. Gotta try your recipe coz the bread looks delicious! 🙂
interesting process for making this bread! I too haven’t bought potato flakes; we had them in the house growing up though. This bread looks light and moist!