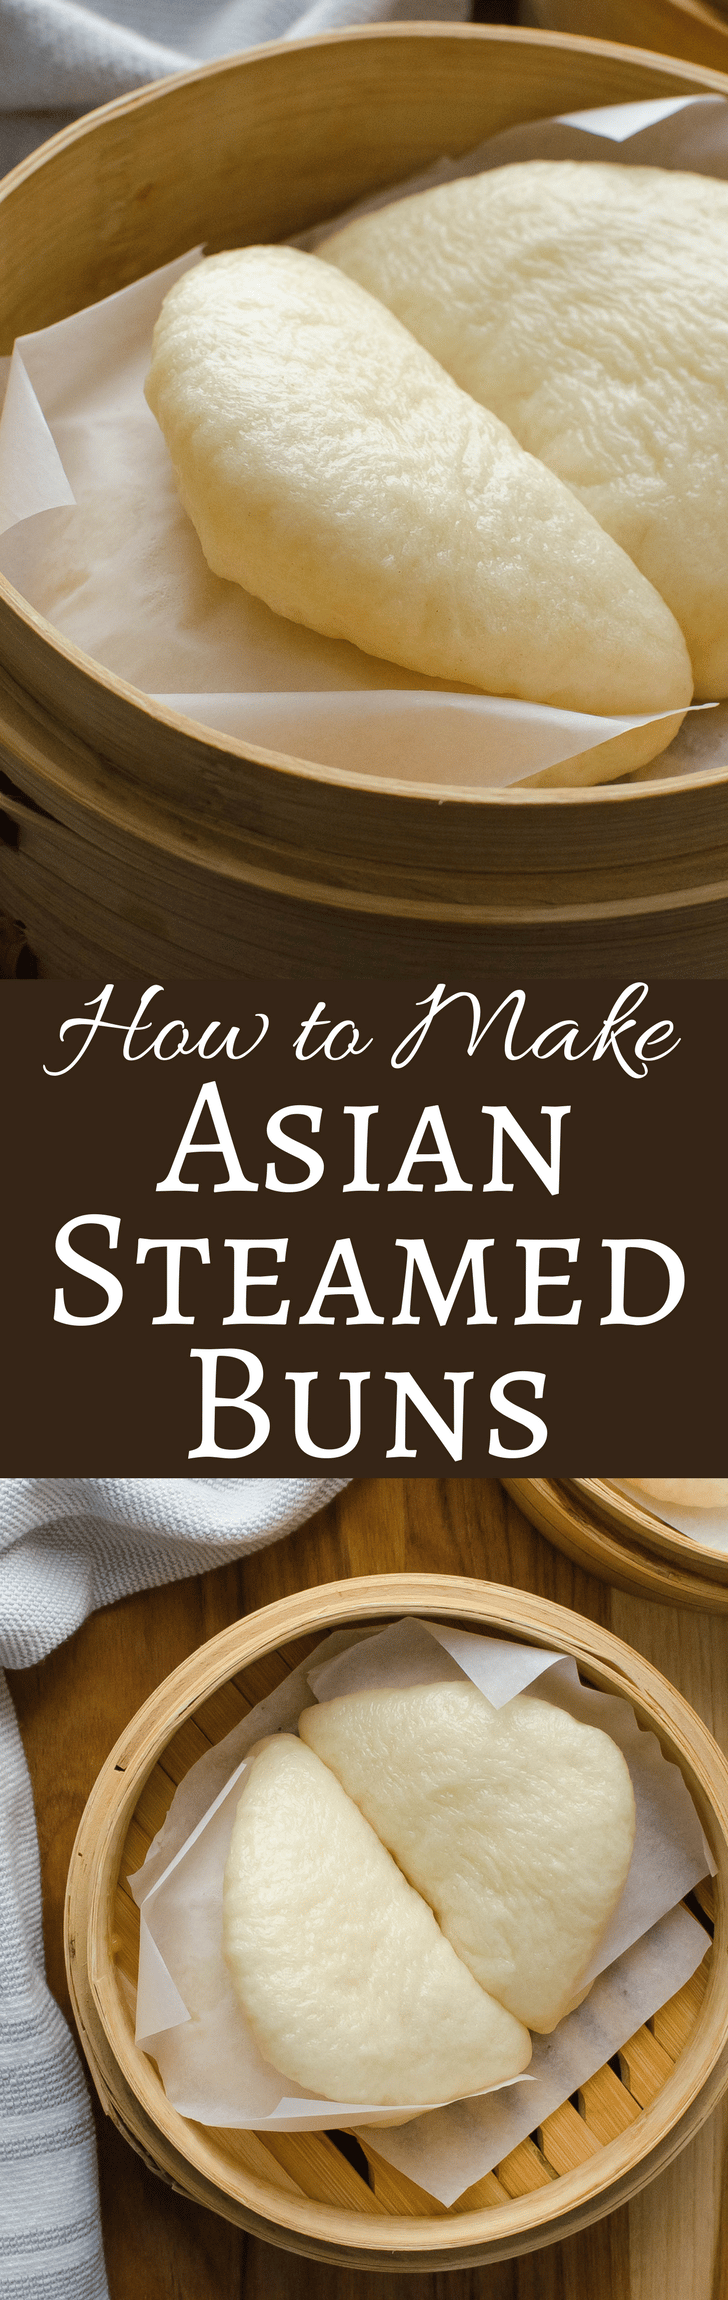
Asian Steamed Buns
These Asian Steamed Buns will wow your friends and family. If you love bao buns as much as me, you’ll want to know how to make your own at home. Asian buns take some time, but they’re worth it.
As far as weaknesses go, this is a big one for me. Asian steamed buns. They are light, slightly sweet conveyors of all types of fillings. Also known as Bao, these buns are a blank canvas for whatever you’d like to fill them with… Preferably something savory, sweet and spicy all at the same time. But I’m getting ahead of myself…
Because before we can start on the fillings, we have to make the buns and I have to say, this isn’t for the feint of heart. It’s not difficult, but it takes time and patience.
This recipe is mostly from David Chang of Momofuku. I say mostly because I’ve included a few helpful hints that I think will assist the home cook (like using parchment paper to steam the buns). As I read through his recipe, there were a couple steps that surprised me. The first surprise was NOT ADDING THE BAKING POWDER to the flour… Instead, you sprinkle it over the dough after the first rise. Weird. I wish I understood the science behind that maneuver.
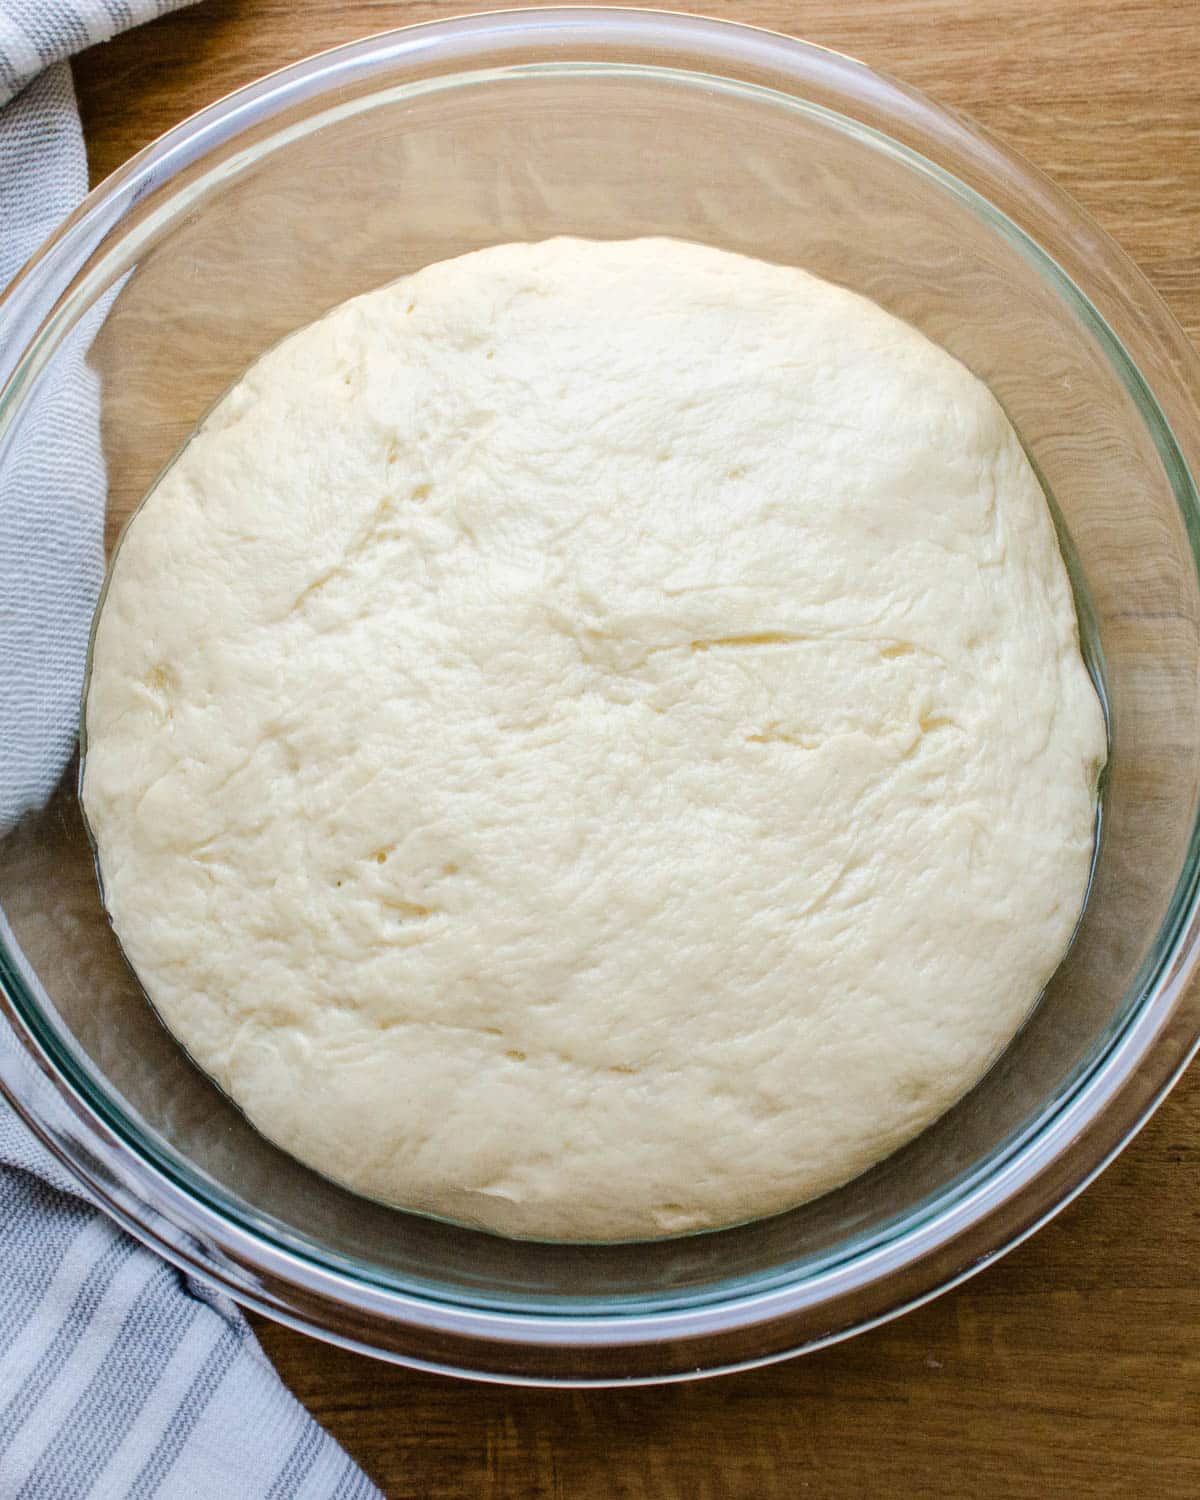
After the baking powder is sprinkled over the dough, you knead it into it. Let it rise for another 30 minutes.
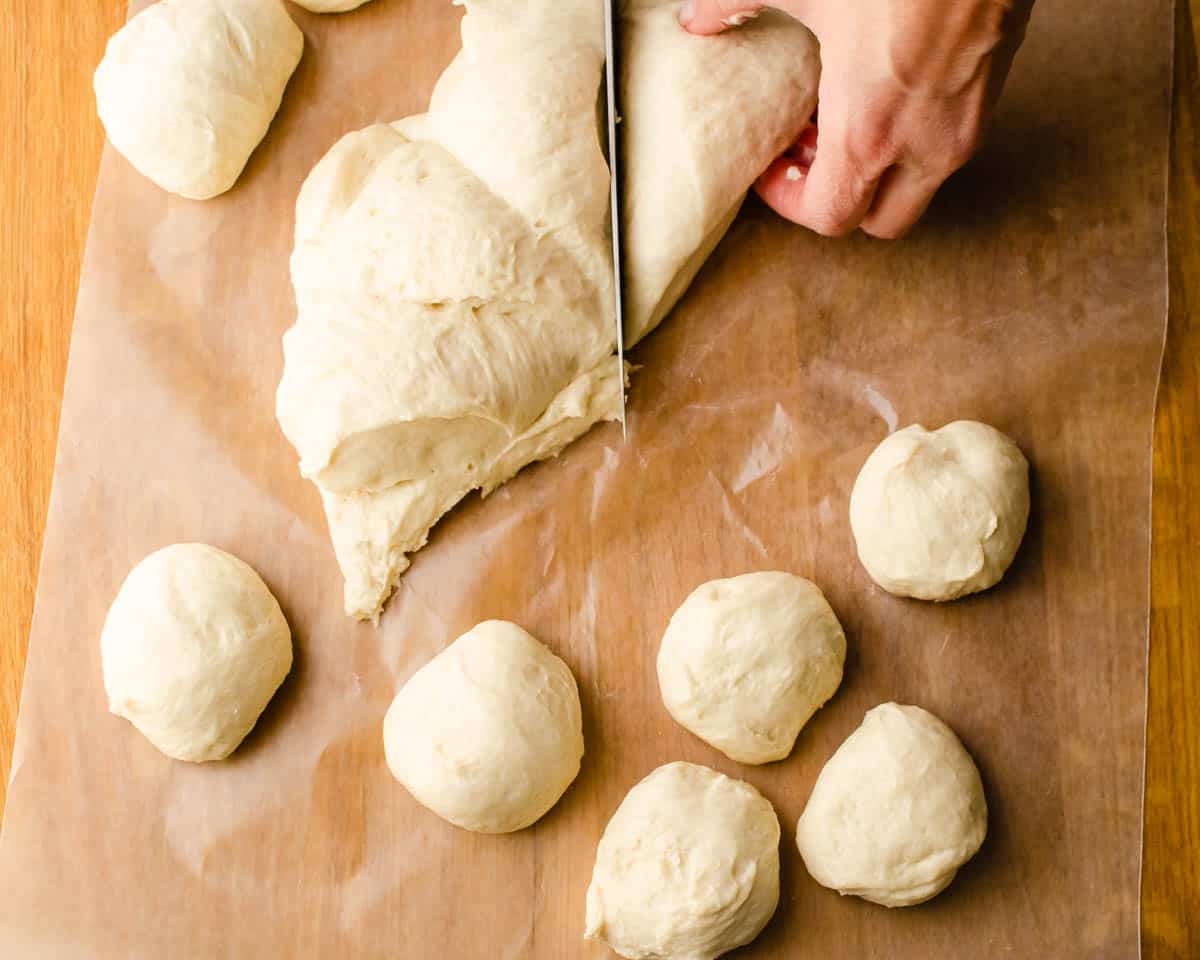
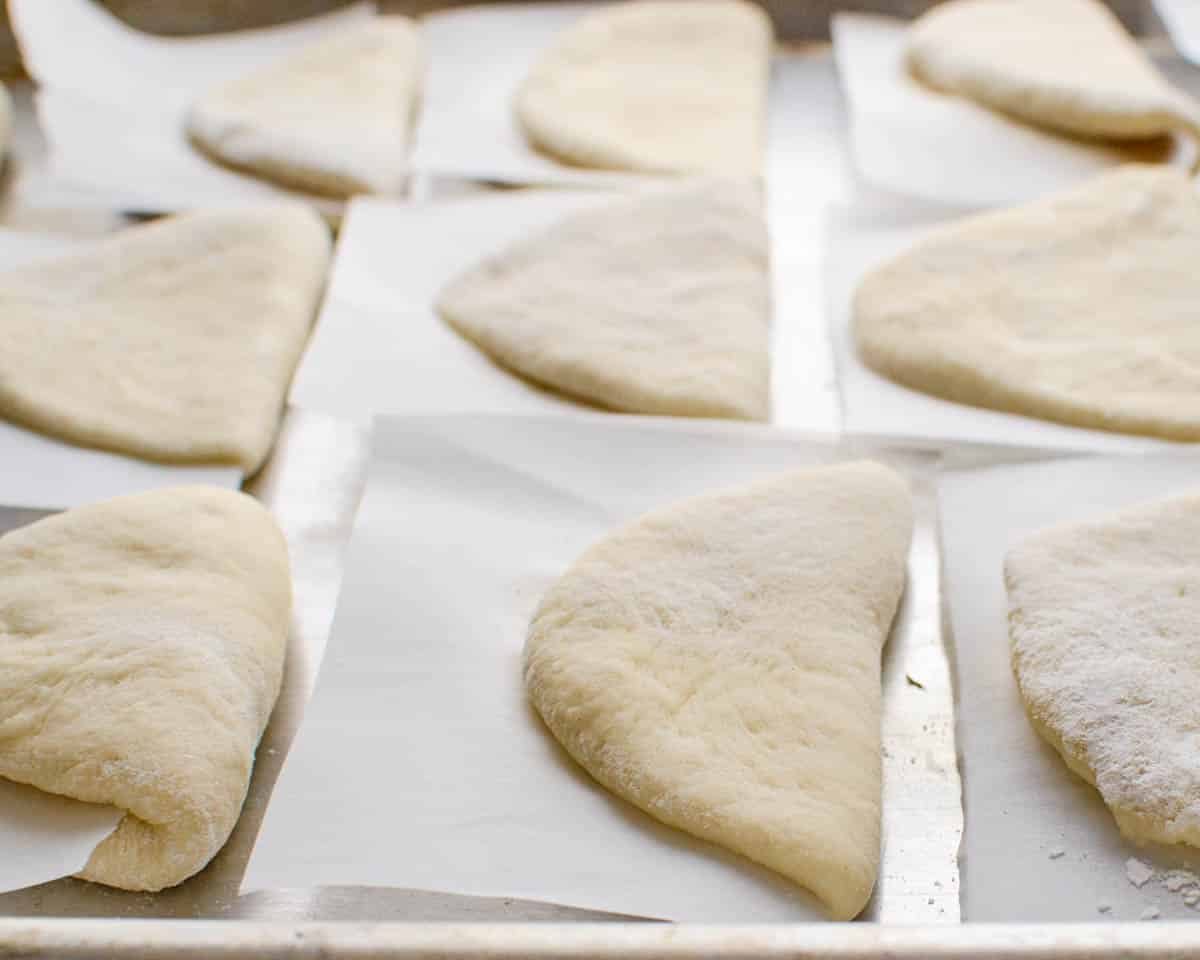
Then divvy up the dough into 16 equal portions and roll them into balls. Let them rest for another 30 minutes. Meanwhile cut 16 pieces of parchment paper roughly 3″ x 2″ to tuck into the buns to prevent them from sticking together.
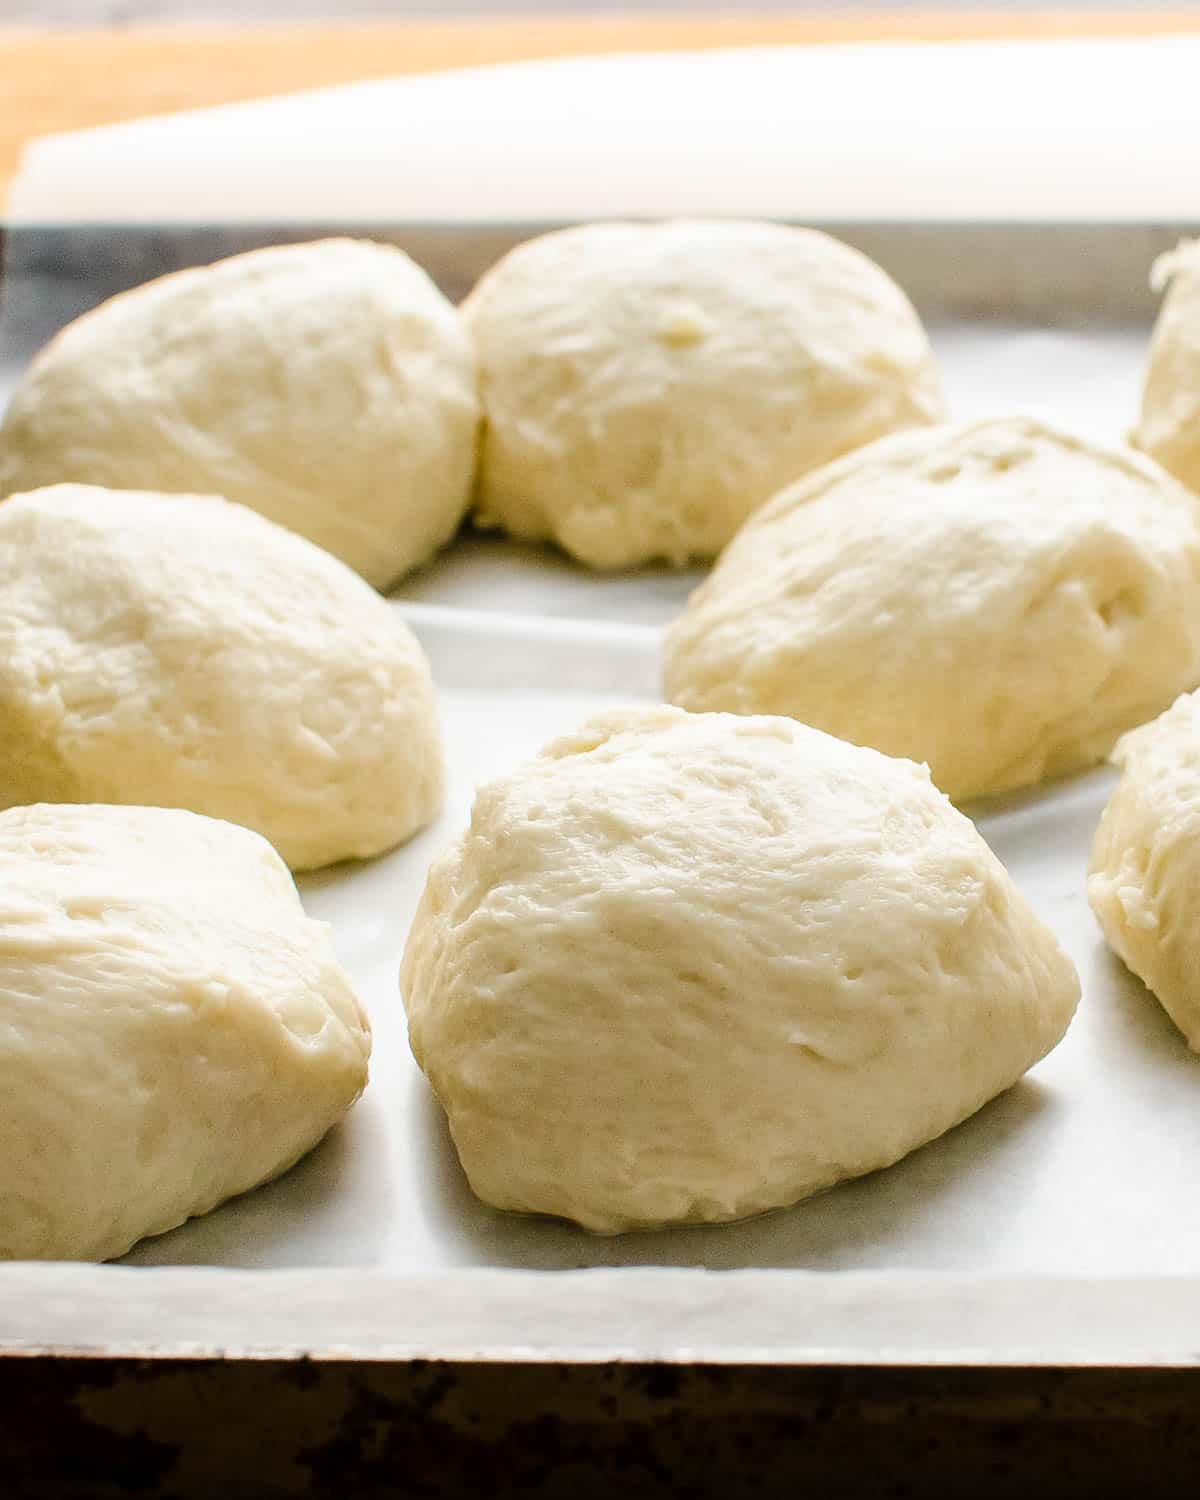
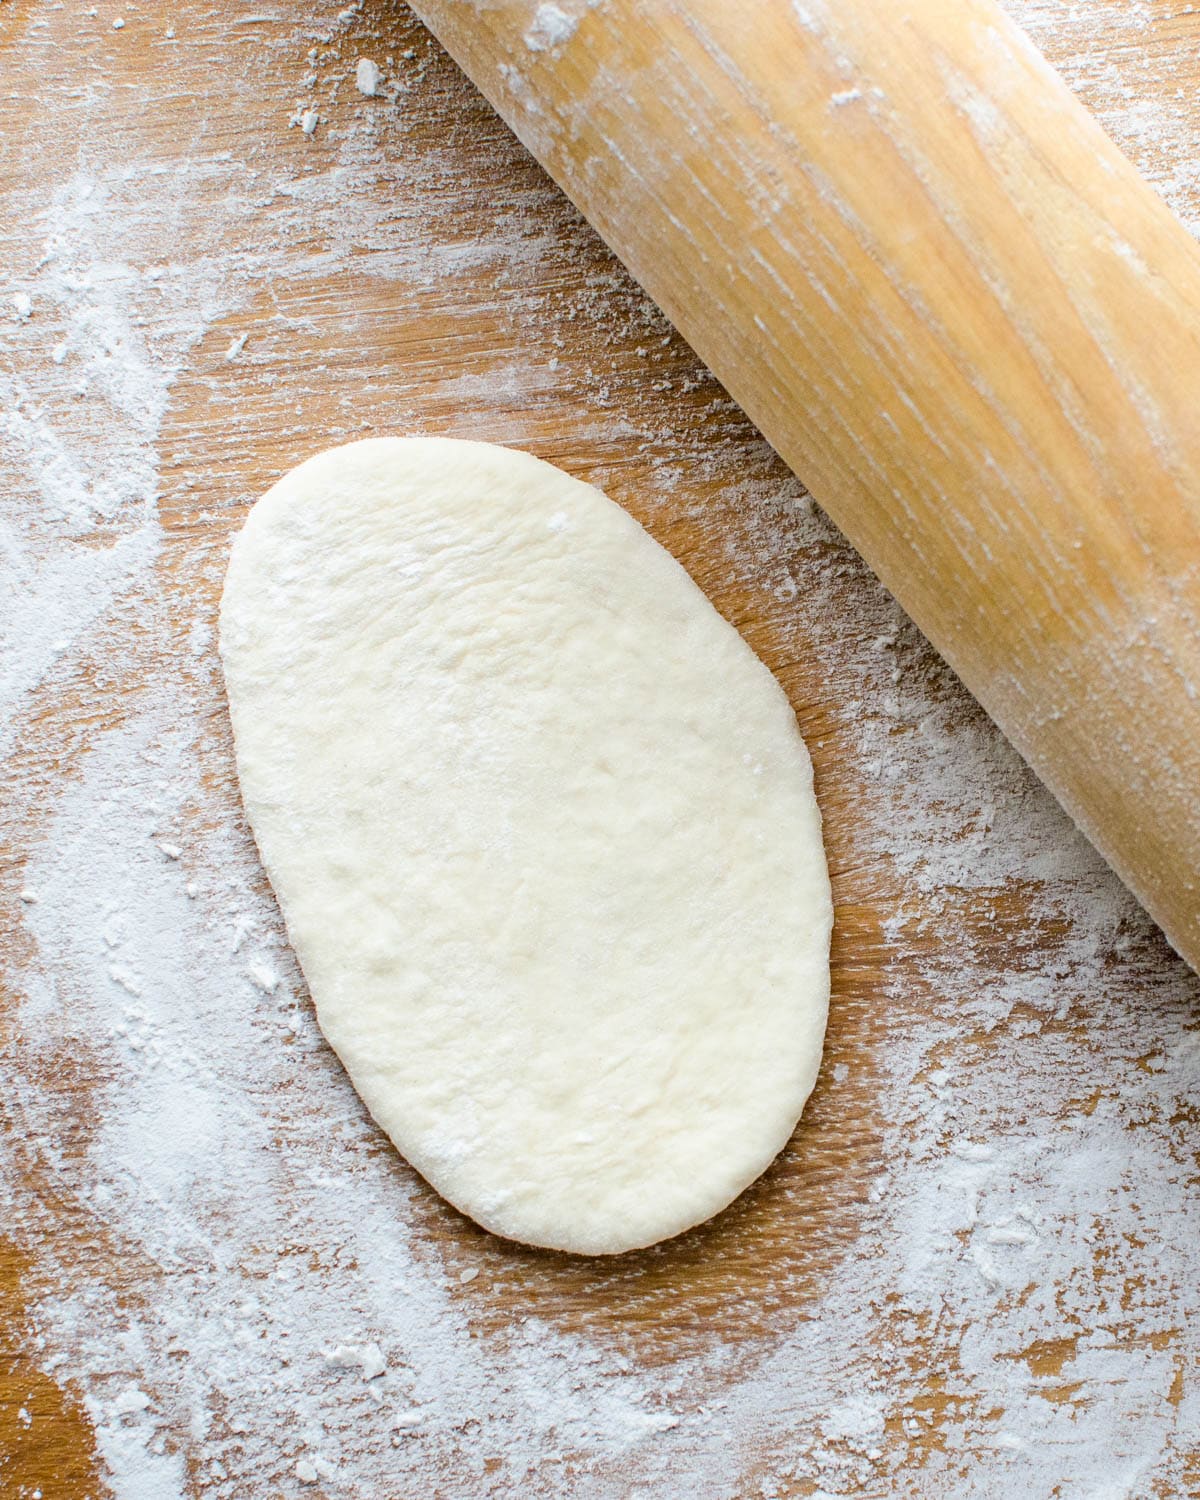
After the dough has rested, roll out the dough balls into ovals on a floured board.
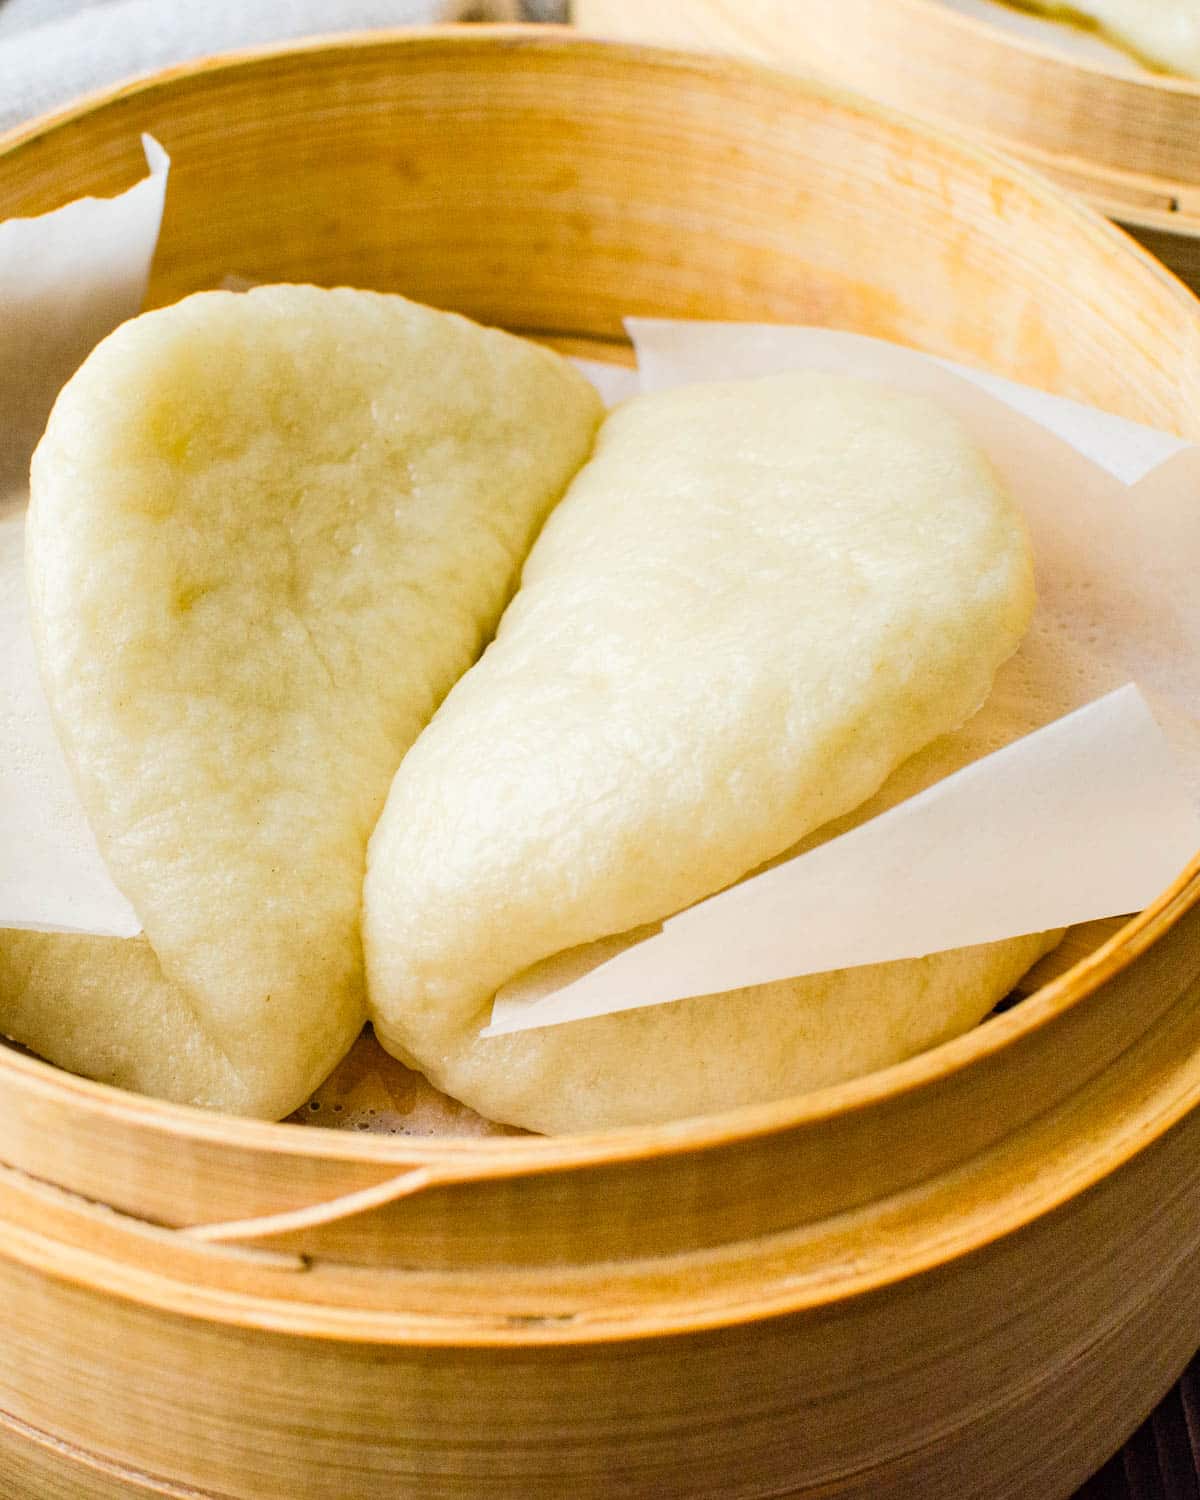
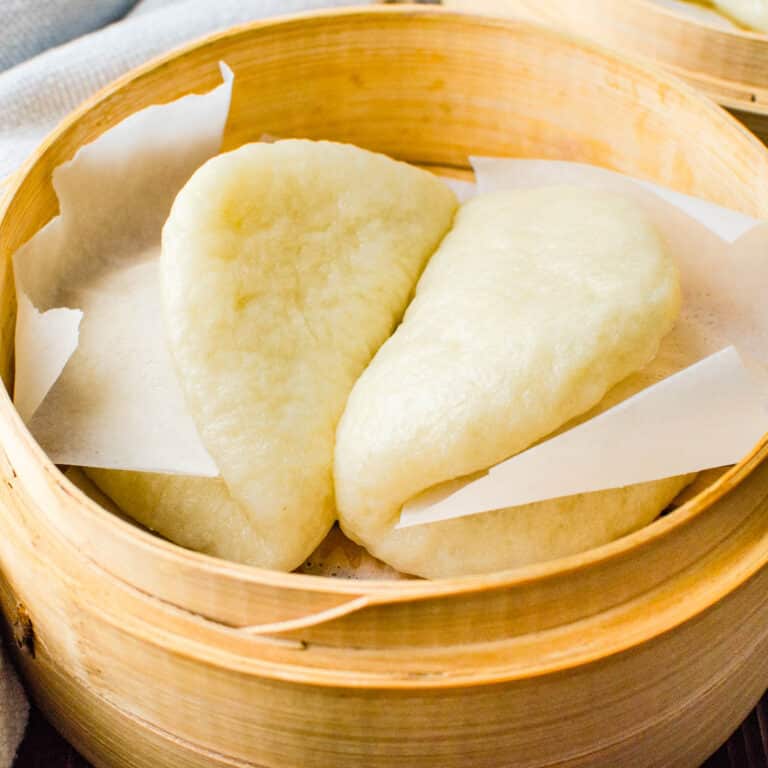
Place the parchment paper on the bun, bisecting the oval.
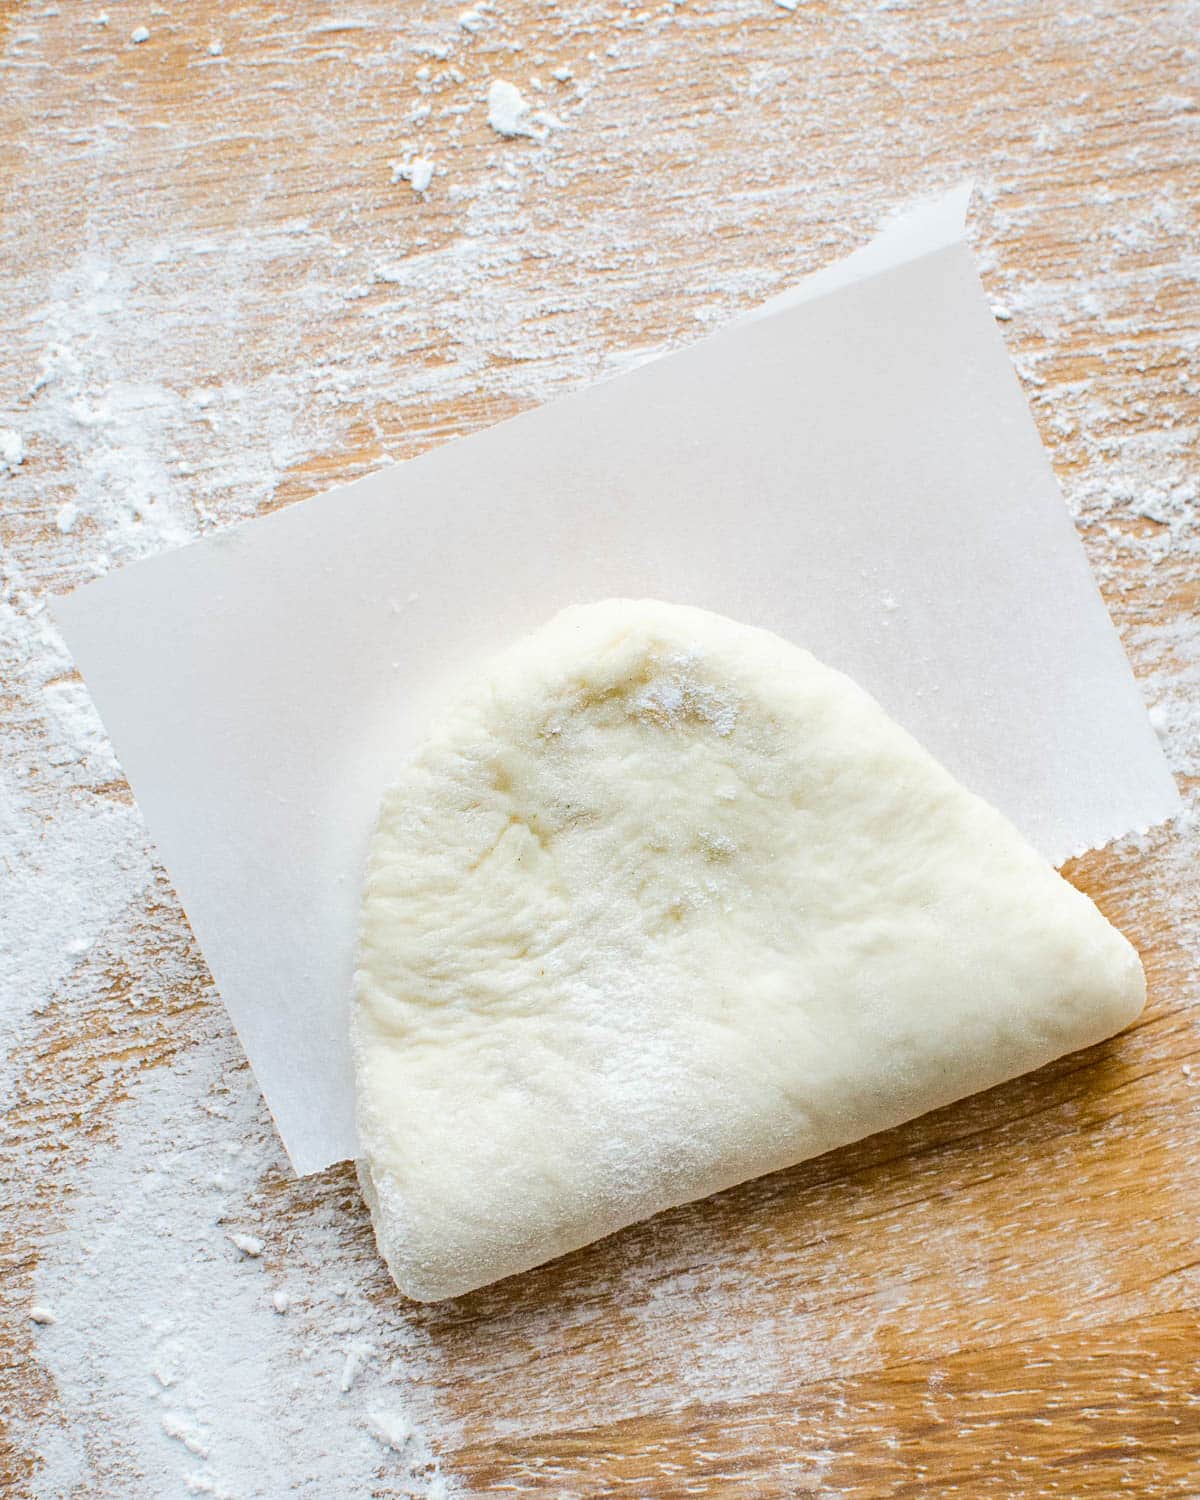
Fold it over.
Line a bamboo steamer with more parchment paper so the buns don’t stick. Place the buns inside. Put about 1″ of water in a pot that will hold the steamer basket and heat to a boil. Reduce heat to a simmer. Fit the buns into the steamer and carefully place the steamer rack in the pot of steaming water (use oven mitts so you don’t burn yourself). Cover the pot.
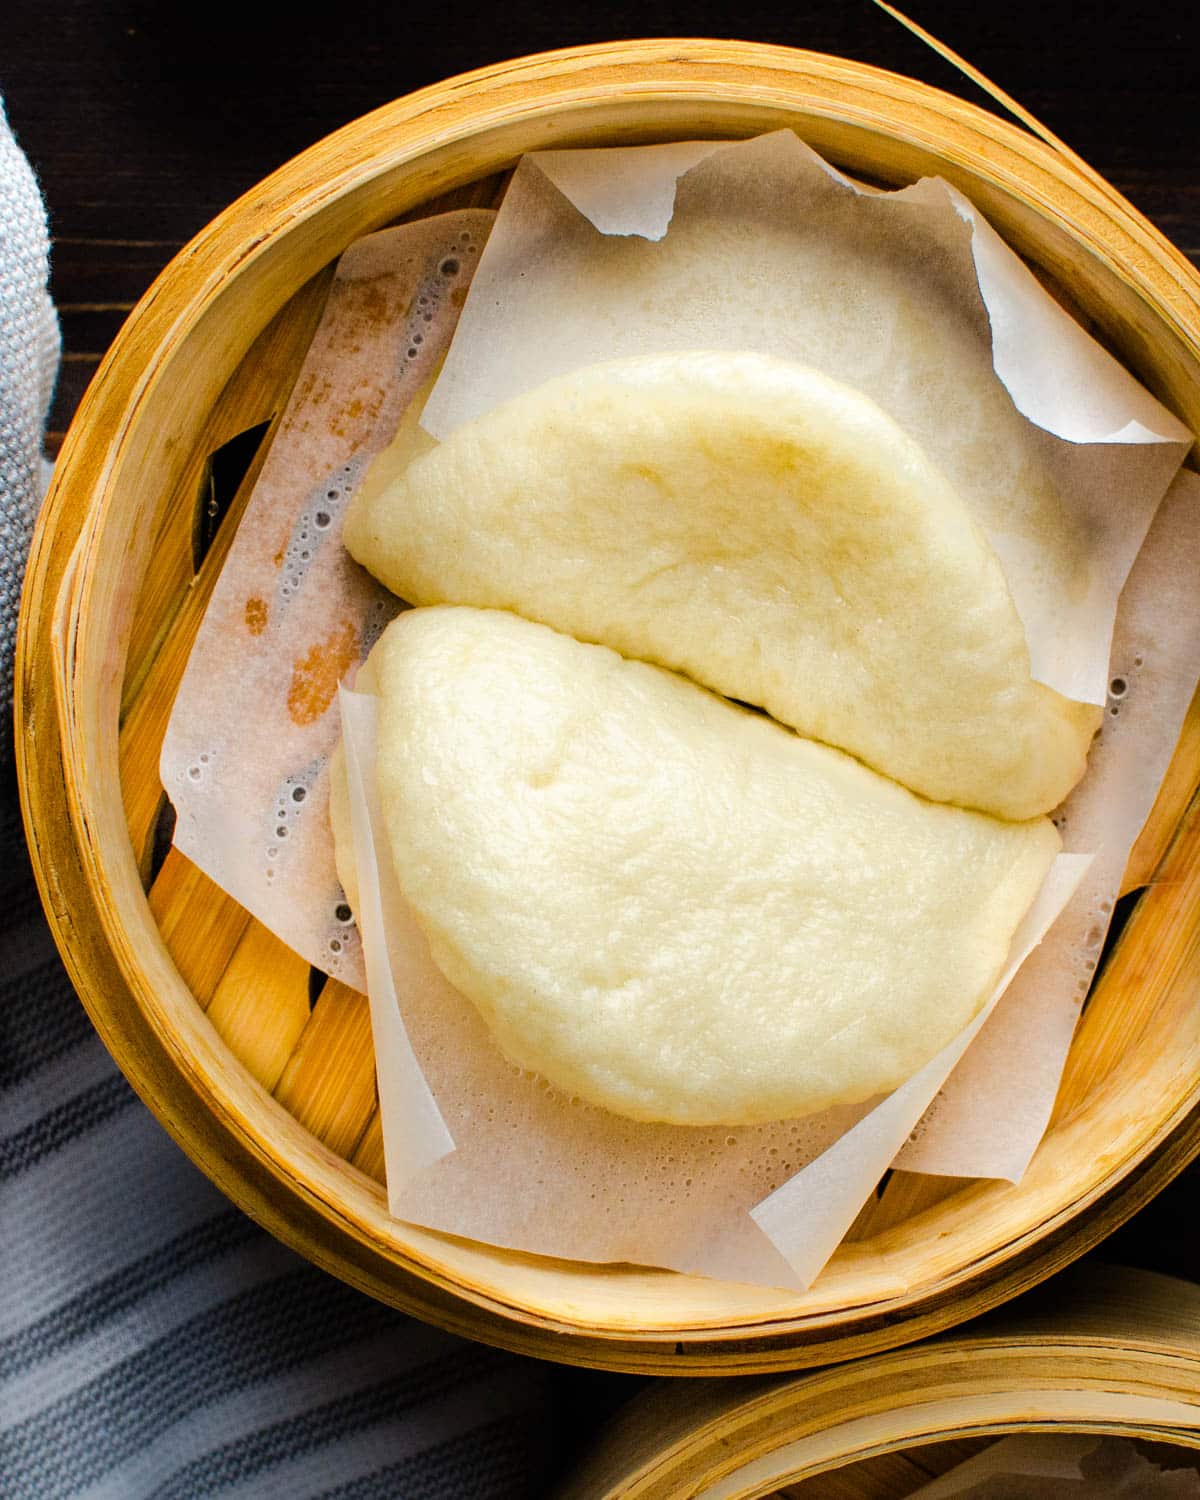
Steam the buns for about 3 minutes until they are puffed and set.
Transfer buns to a wire rack to cool… Now you’re ready to fill them… with Bulgogi Pork or Asian BBQ Pulled Pork.
Asian Steamed Buns
SPECIAL EQUIPMENT:
- wok or large pot large enough to hold the bamboo steamer.
INGREDIENTS:
- 1 cup warm water 105°-115°, divided
- 1 teaspoon active dry yeast
- 3 tablespoons + 1 pinch sugar, divided
- 2 tablespoons nonfat dry milk
- 3½ cups cake flour
- 1½ teaspoons baking powder
- canola oil for brushing bowl
DIRECTIONS:
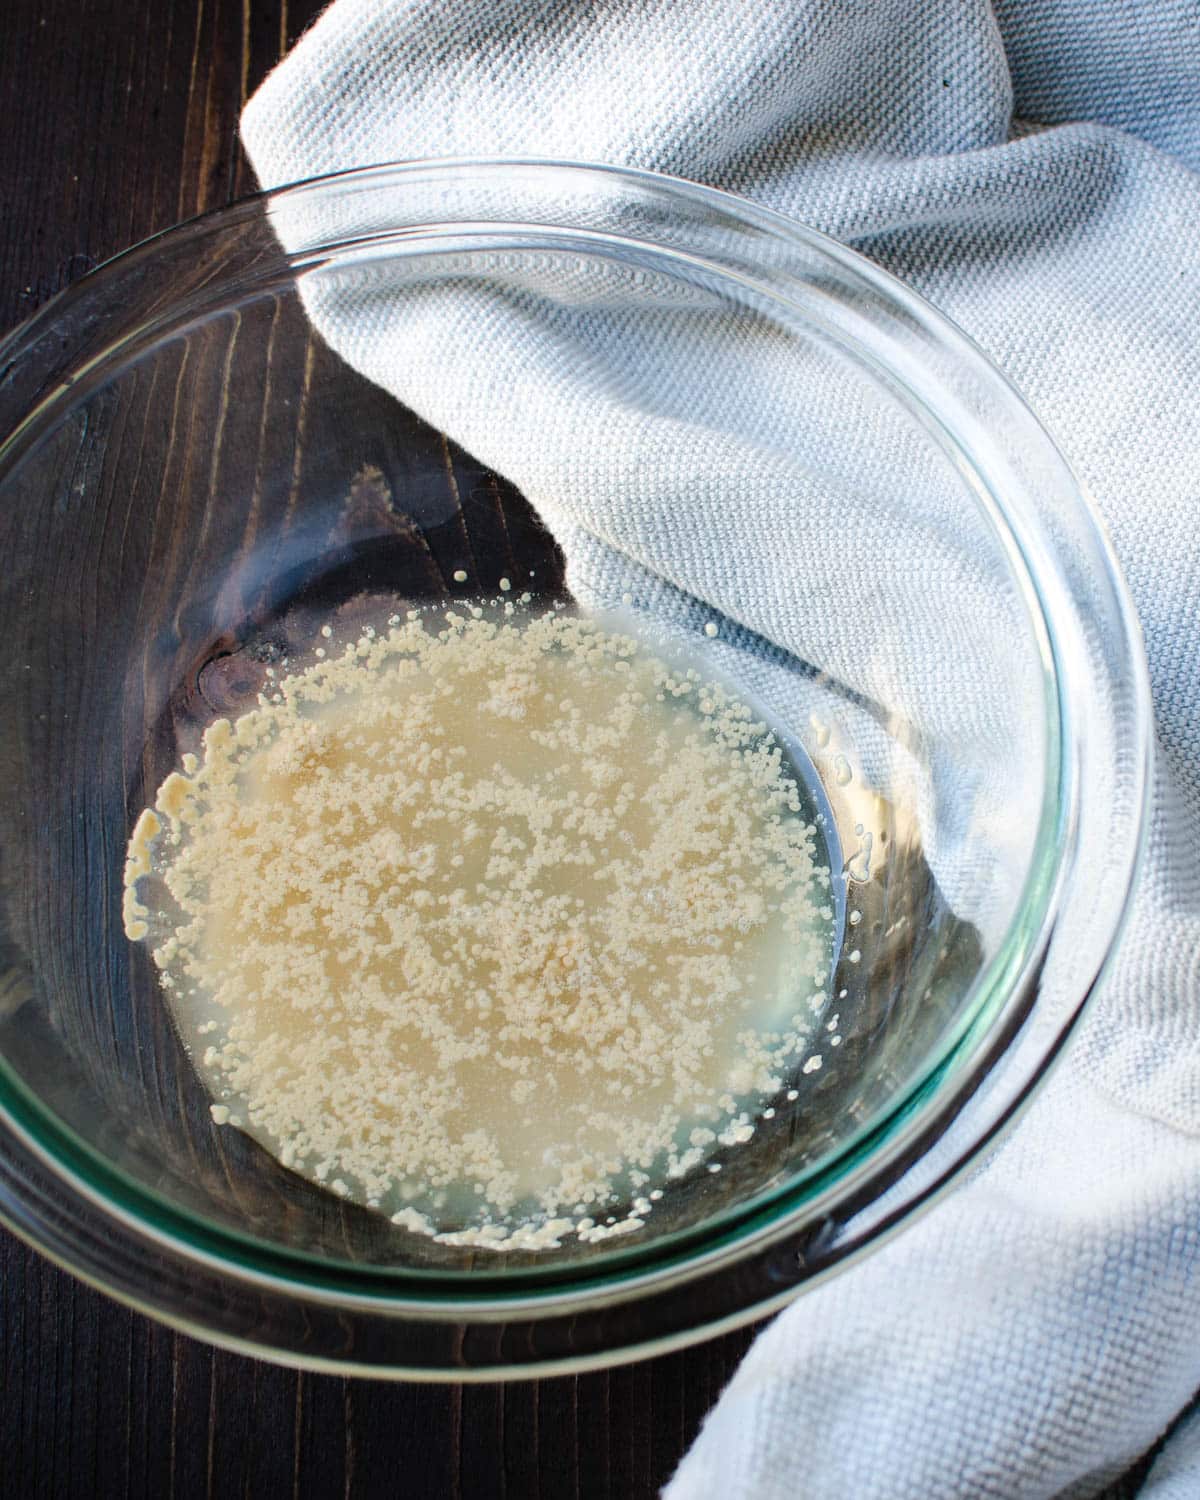
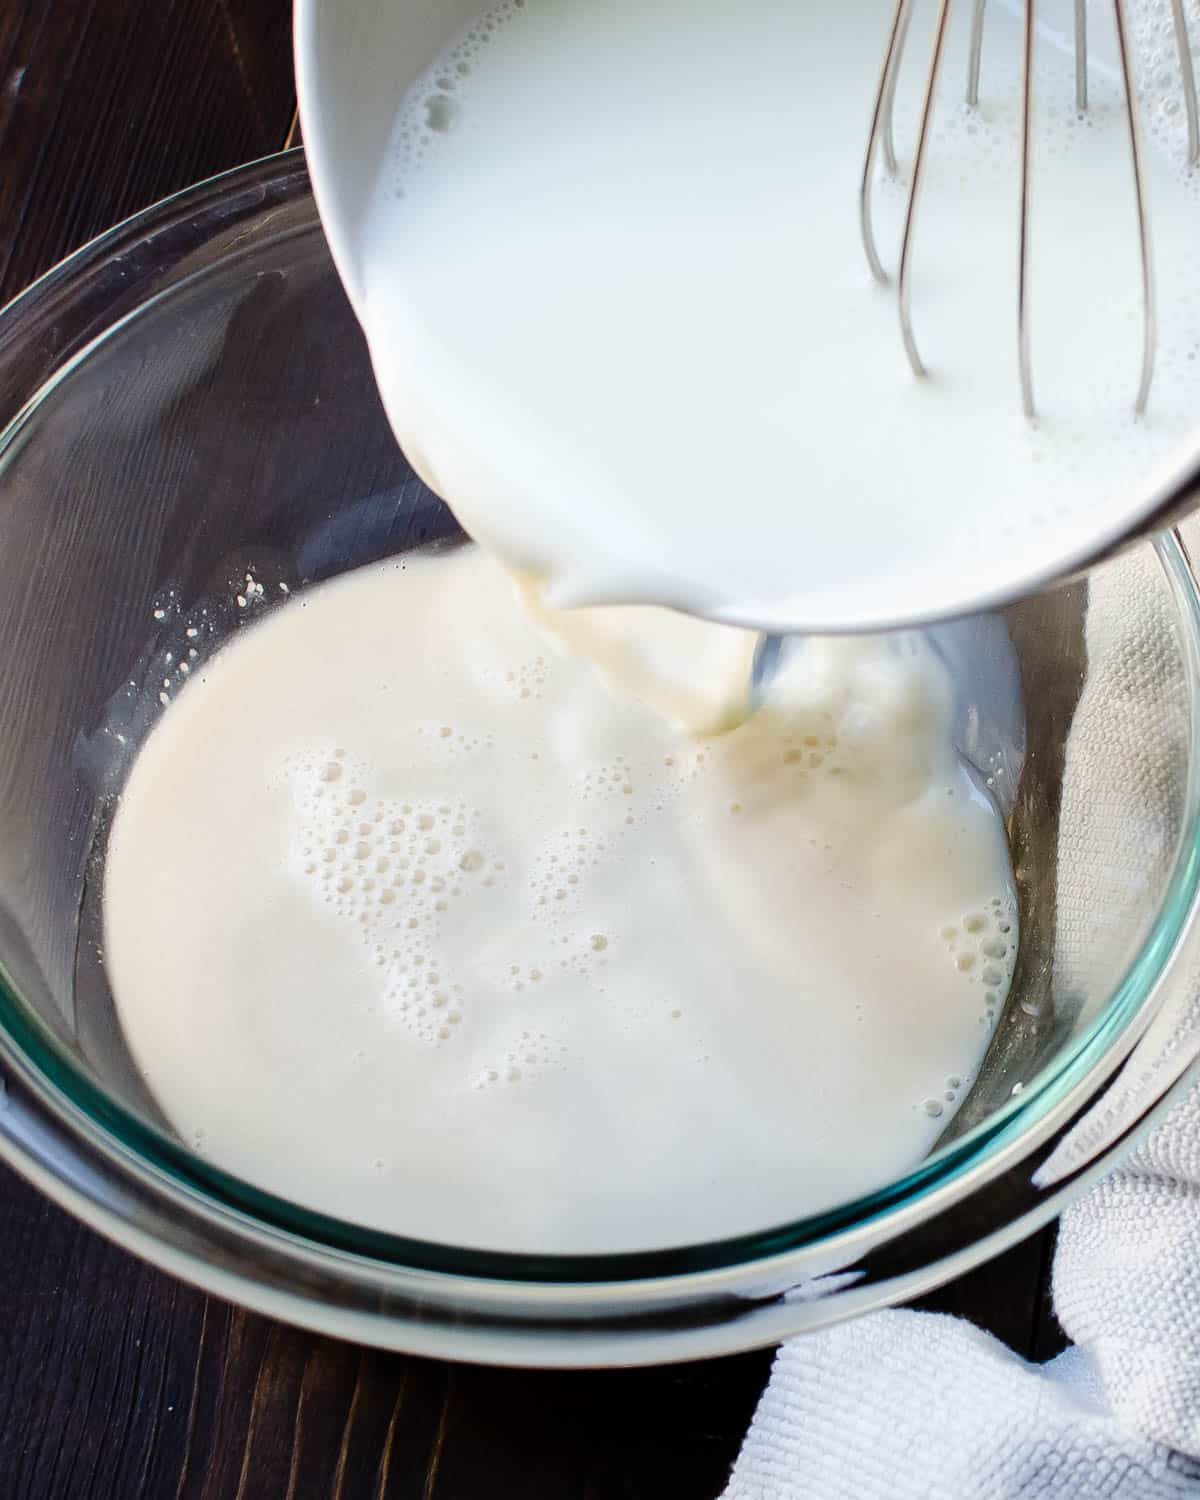
- Stir together ¼ cup warm water with yeast and pinch of sugar. Let stand until foamy, 5 to 10 minutes. (If mixture doesn't foam, start over with new yeast.) Whisk in dried milk and remaining ¾ cup warm water.
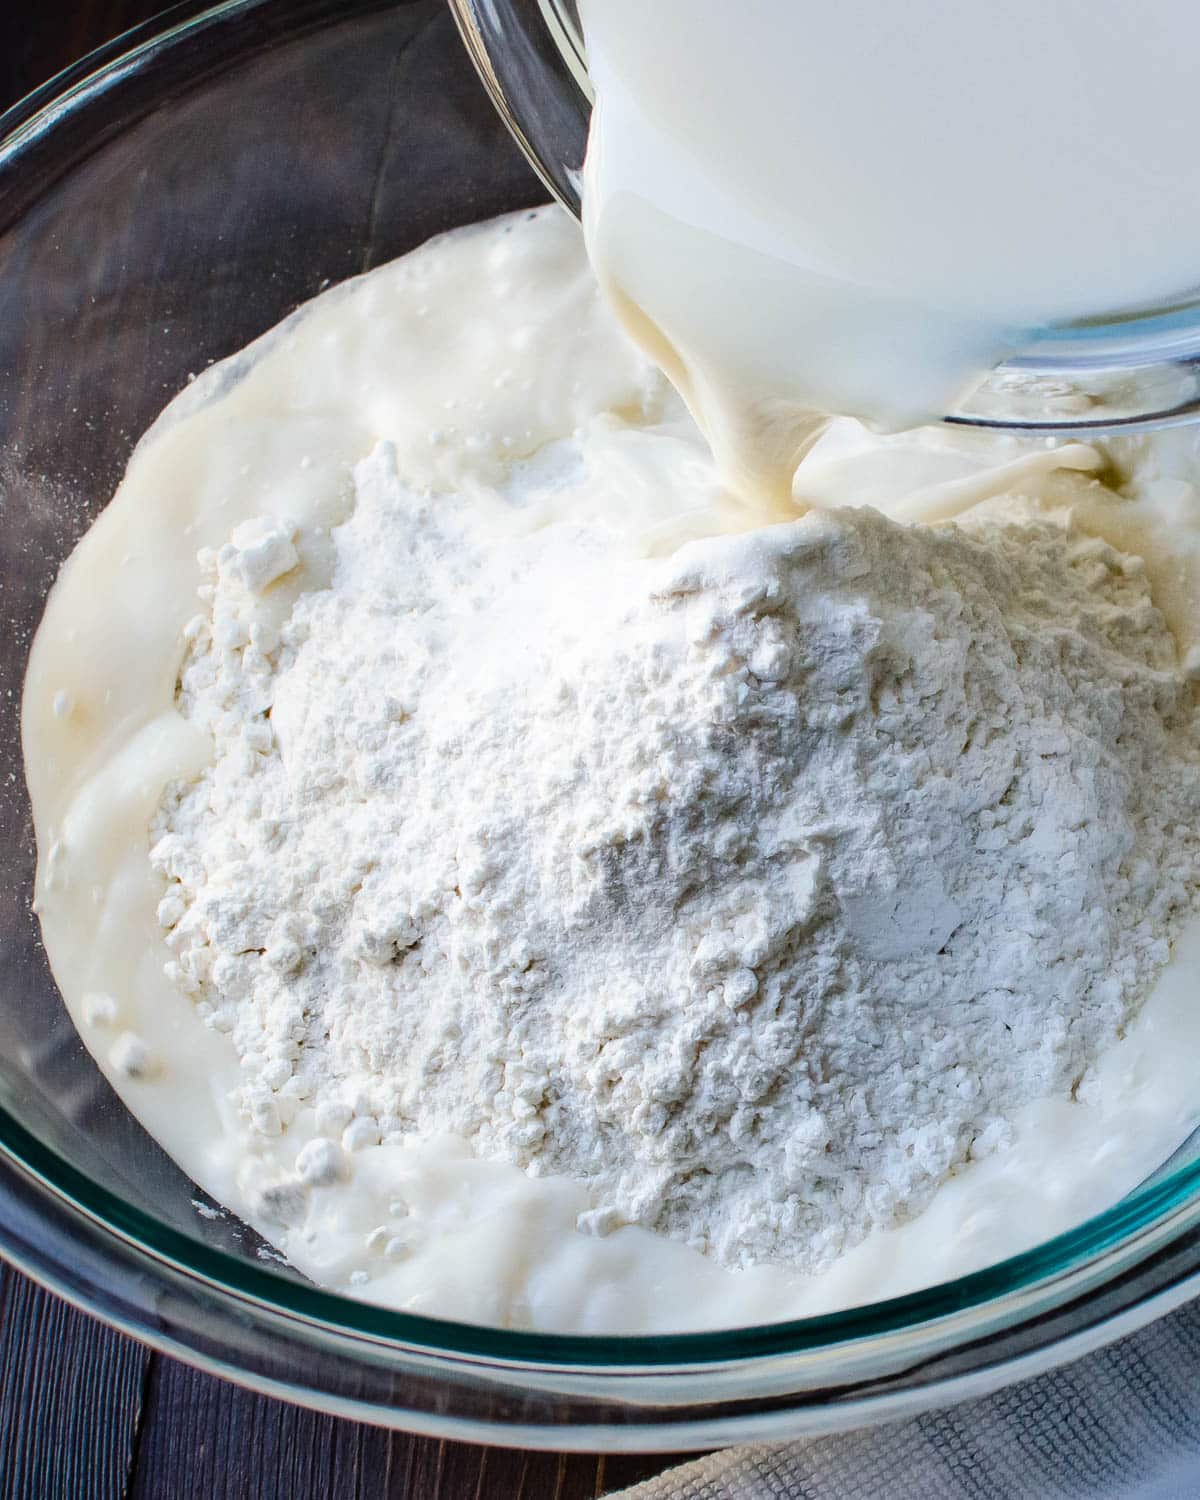
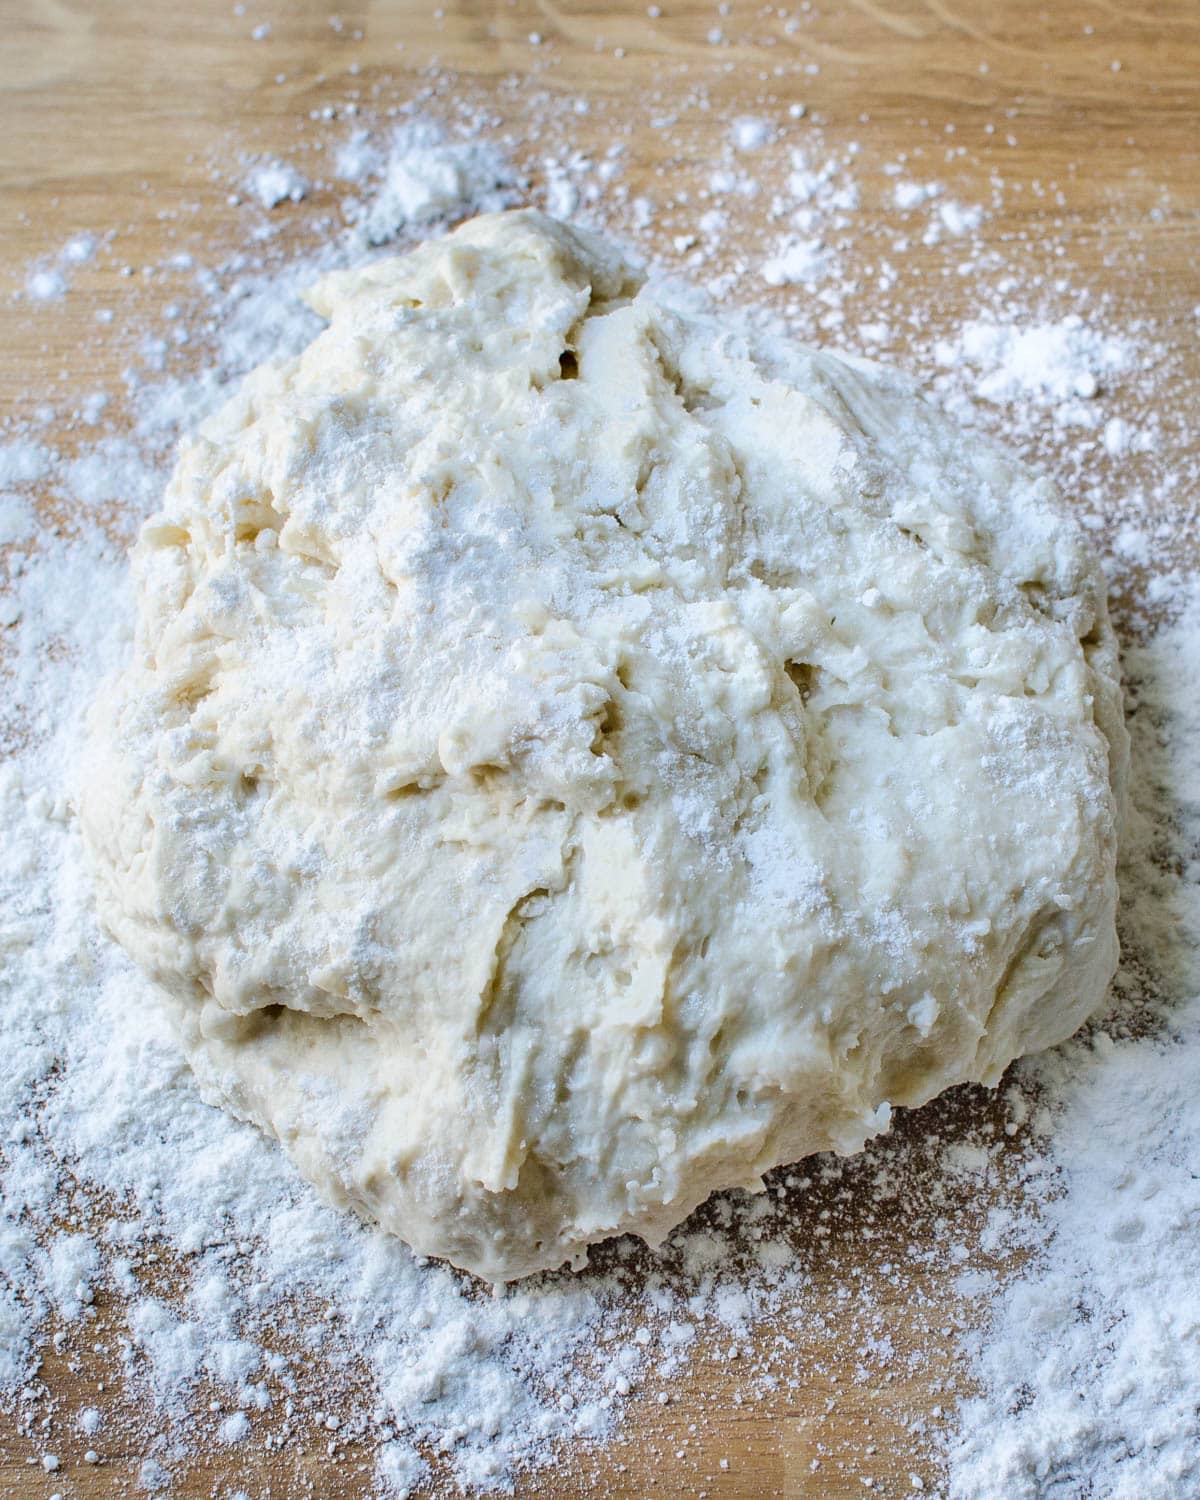
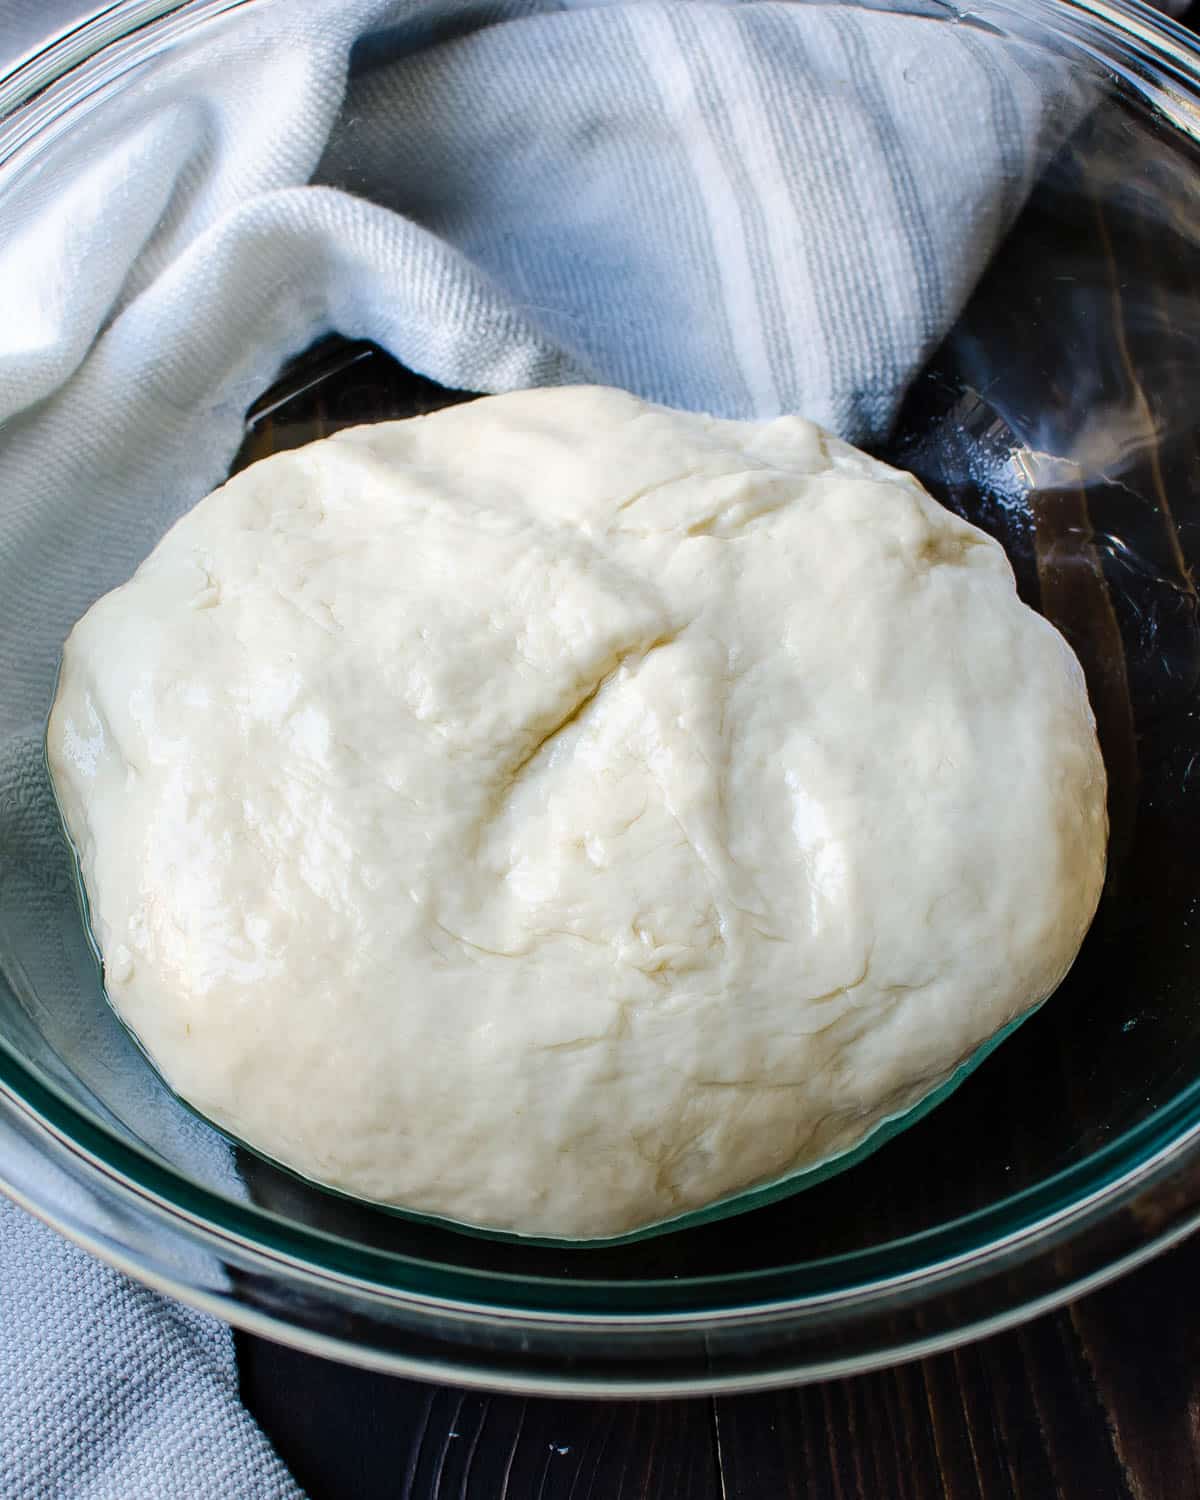
- Stir together flour and remaining 3 tablespoons sugar in a bowl, then stir in yeast mixture (do not add baking powder yet) with a fork until a dough forms. Knead dough with your hands in bowl until all of flour is incorporated. Turn out dough onto a floured surface and knead, dusting surface and hands with just enough flour to keep dough from sticking, until dough is elastic and smooth but still soft, about 5 minutes. Form dough into a ball.
- Put dough in an oiled large bowl and turn to coat. Cover with plastic wrap and let dough rise in a draft-free place at warm room temperature until doubled, about 2 hours.
- Punch down dough, then transfer to a lightly floured surface and flatten slightly into a disk. Sprinkle baking powder over center of dough, then gather edges of dough and pinch to seal in baking powder. Knead dough with just enough flour to keep dough from sticking until baking powder is incorporated, about 5 minutes. Return dough to bowl and cover with plastic wrap, then let dough stand 30 minutes.
- Cut 16 (3- by 2-inch) pieces of parchment paper.
- Form dough into 2 equal rounds. Cut each round into 8 equal pieces. then lightly dust the dough with flour and roll them into balls. Place the dough balls on a baking sheet and cover loosely with plastic wrap. Let the dough rest for 30 minutes before continuing.
- Roll out 1 piece of dough into a 6- by 3-inch oval, lightly dusting surface, your hands, and rolling pin. Pat oval between your palms to remove excess flour, then place one of the small pieces of parchment paper over half of the bun and fold the other half over the parchment. Place bun on a piece of parchment paper on a large baking sheet and cover loosely with plastic wrap. Make more buns with remaining dough, then let stand, loosely covered, until slightly risen, about 30 minutes.
- Line a steamer rack or bamboo steamer (that will fit inside your pot or wok) with parchment paper to prevent sticking.
- Set a large steamer rack (bamboo steamer) inside a pot (or wok) and add enough water to reach within ½ inch of bottom of rack, then bring to a boil. Reduce heat to a steady simmer. Place buns in steamer rack (do not let buns touch). Cover tightly and steam until buns are puffed and cooked through, about 3 minutes. Transfer buns to a plate with tongs, then discard wax paper and wrap buns loosely in kitchen towels to keep warm. Steam remaining buns in batches, adding boiling-hot water to skillet as needed.
- Notes: Buns can be steamed and cooled completely, then chilled, wrapped tightly in a double layer of plastic wrap, up to 1 day or frozen up to 1 week. (Thaw wrapped frozen buns in refrigerator.) Reheat buns, wrapped in a dampened kitchen towel and wrapped tightly in foil, in a 350°F oven until soft and heated through, about 15 minutes.
RECIPE VIDEO:
NOTES:
NUTRITION:
Pin “Asian Steamed Buns” For Later!
Nice